
Een Juan Estruch gitaar uit de jaren zestig, althans af
te leiden uit het label in weer goede, bespeelbare staat.
SOLD.

Over de toets kan ik niet heel duidelijk zijn: Wellicht
toch geen ebben maar palissander. Een waaiervormige
bebalking van 5 stuks. Keurig houtwerk in de klank-
kast en een mooi gemodelleerde Spaanse hak aan
de binnenkant. Massief fichten bovenblad.

Een wat rijker versierd model met goudkleurige
stemmechanieken en mooie randinleg zoals je dat
ook bij de Concerto modellen tegenkomt. Mahonie-
houten klankkast en een prima geluid dat nauwe-
lijks hoeft onder te doen voor de Concerto reeks.

Fraai uitgevoerde rozet. En het fretwerk is helemaal
nagelopen, rond gemaakt en opnieuw gepolijst.

Het Juan Estruch Label zoals je dat ook tegenkomt
op de site van Jedistar waar dit label gedateerd wordt
zijnde van de zestiger / zeventiger jaren. Geen
modelnummer wordt hierop vermeld..

Dit label is vrij lang in gebruik geweest bij Juan Estruch.
De firma Estruch zat al op Calle Ancha 30 vanaf 1902 onder
de naam Hermanos Estruch. Juan Estruch Sastre zat eveneens
vanaf 1927 op dit adres evenals een latere zoon Juan Estruch
Pipo. De periode waarin dit ronde label werd gebruikt, strekt
zich echter uit van plm. 1930 tot 1960 volgens Ton Bogaard.
Ik heb echter een gitaar uit 19320 gezien waar dit label al
ingeplakt zat.

Nieuw en netjes kambeentje, uiteraard NIET
van plastic. De topkam meet 53 mm breed.

Goed werkende stemmechanieken. Uit de tijd van
de bouw van dit instrument. Vaak zaten deze me-
chanieken maar dan in chroom uitgevoerd op de
studentengitaartjes van Spaanse bouwers.

Prettige speelactie en dat in combinatie met een men-
suur van 645 mm. Geschikt voor kleinere handen.

Wel wat gebruikerssporen maar nergens scheuren

Vreemde optie voor de kop om daar een
andere kleur houtsoort voor te gebruiken. Dat
hals en kop uit een stuk zou moeten zijn gemaakt
is natuurlijk een fabeltje maar vaak is het mooi
weggewerkt bij de duurdere instrumenten.

De meerkleurige randinleg zoals je dat ook tegenkomt
bij de bekendere Concerto reeks. Deze gitaar kom je
ook tegen op de site van Reverb waar er 350 Dollar
voor gevraagd wordt en dan krijg je er gratis wat
scheuren in de klankkast bij!

Netjes gemodelleerd nieuw kambeentje en frets
zonder enige slijtage sporen.
Juan Estruch ( from 1930 onwards )

A fairly old Juan Estruch but with the round label the
company used from 1920 until 1954. Adress: Calle Ancha 30
Barcelona (Source: Romanillos). In the mid twenties of the last
century Juan Estruch Sastre imported wood and materials
(from 1919) and guitars (1923-25) from Telesforo Julve
and by seeing the typical bridge inlays this could have
been one of them. Even the carving of the bridge is identical
to the TJ bridges. This is more than a coincidence!

It is obvious the guitar has "lived" and will be brought back
to live though there is a lot left to be done. In fact the Rosette
shows us a nice wooden inlay so no concentric circles only!
Funnily enough I found the exact same rosette on a Telesforo
Julve guitar and with the same executed extended fingerboard -
no coincidence of course! This guitar has a three piece
soundboard as can be found more often on TJ's.


So the rosette here above left comes from a Telesforo Julve
guitar and one might compare this with another more elaborate
built up rosette on a Salvador Ibanez e Hijos guitar also in this
Blog. I've added it here as the red and white inlays only differ a
bit from the rosette of this Salvador Ibanez guitar. TJ took over
the Ibanez workshop and possibly some workers there. The
rosette at the right however comes from an Audex labelled
guitar but made by Jose Roca and similarities with this
rosette are also there....


Though the label here above says Juan Estruch we have to conclude
that this guitar has been made in the Jose Roca factories. The rosette
itself in fact was already a confirmation around this subject. By
looking at the period this label was used one might conclude that
this instrument was made by the granddaughter of Andres Marin
who had her business before Jose Roca took over.
In fact the rosette was already a bit of a confirmation that
the Valencian workshops exported a lot of their guitars to
other cities and abroad. The two abalone inlays were just
a funny addition that came to the clients' mind on this
S. Ibanez e Hijos labelled guitar from around 1920.
Another remarkable move was the narrow 5 fan bracing
in this guitar as is there in the Juan Estruch guitar
from about 1925 decribed here.

The back and sides are making this guitar even more
remarkable as one can conclude the wood to be walnut
but of a higher quality. A cedar neck with a fingerboard
of a strange reddish color but dense enough to do a good
job! The same wood I have found on my Telesforo Julve
from the fifties. Soundboard is spruce, fairly wide grained.
The soundboard is supported by a 5 fan bracing but all
quite close to each other. The inner heel shows a higher
standard than was usual in the Telesforo Julve guitars.

A "Torres" kind of head form, Estruch later used for the
Concerto series. Wether if the tuners are original I really
do not know. The headstock is nicknamed: "shouldered".
But in fact a bit crudely shaped so I will make some
corrections to it though I know: not original anymore.
The "original" shape has been damaged on the back
so that's the reason I will reshape it.

I decided to proceed the restoration from this guitar as
the sound is surprisingly good and complete. However
the markings at several places on the back of the neck
and the placing of a new fingerboard urged me to
relaquer the neck and head. As the head was not treated
that well I had to remove some damages and decided
to redress the head as a whole to a more Torres-like
approach. Thoroughly cleaning of old tuners in fact
is a must. Here the final result can be seen.

The typical "Valencian" way of constructing a heel.
The heel is rounded and that would date the guitar
between 1909 and 1945. ( If this is a Telesforo Julve.)
Please note that Marcelo Barbero also used this way
of constructing a heel.

The tuners from which it is questionable if they were
there at the birth of this guitar. So, what to do first:
As the transverse bar under the fingerboard came off
the guitar already had a bad playing action but even
after repairing that it will not solve the whole problem.
The back is partly loose so the invitation lies there:
"Remove me please" then it will be possible to lift the
soundboard a bit with a reglued brace. A neck reset is
easy when the back has been removed but a Spanish
heel is allways a bit of a problem. These tuners have
been spot as well on a 1920 / 1930 Juan Estruch so
it could have been possible that some guitars were
assembled in Barcelona as the other Estruch was a
really high end model of the company.
A remark should be made here about the way of mounting
the well known button / worm gear invention as that hasn't
been always the same! Roughly between 1910 and 1920
the way the machine heads were mounted changed. Here
above presented is the way most companies are doing it
nowadays but before 1910 the worm gear was mounted
closest to the guitar body and the cylinder or capstan
followed. The same can be concluded when looking at
older mandolins.

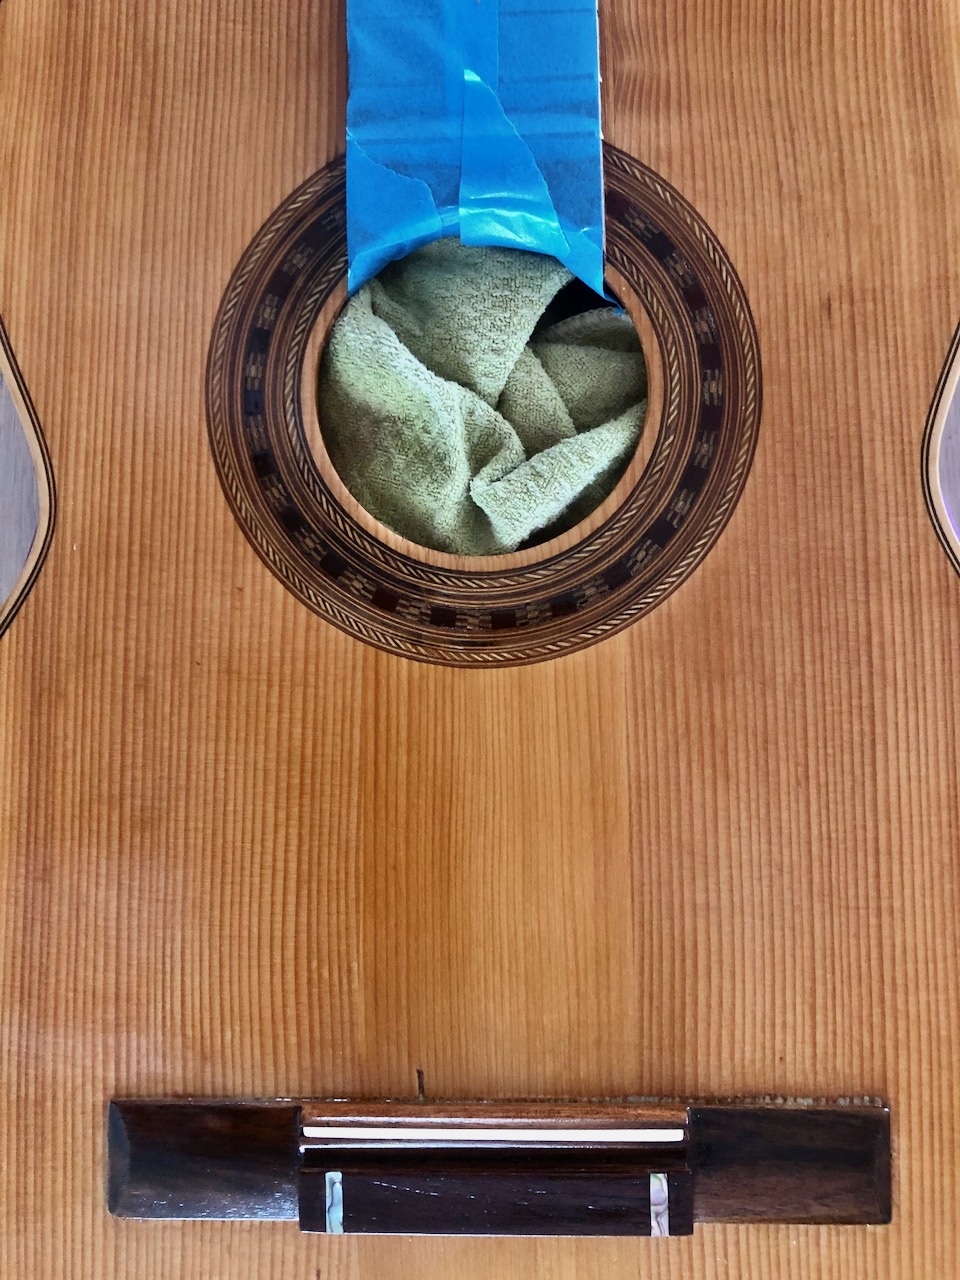
On this picture the rather strange 5 fan bracing is visible.
Strange in a sense that the 5 bars have been placed quite
close to each other. Another remarkable feature is the
placing of 6 clamps in the lower bout in order to
strengthen the two seams of the 3 piece soundboard.

The brace left most likely got loose and as a result the
fingerboard "moved' under the string tension as can be
seen in the sound hole. Obviously the soundboard as
a whole shows a sag at that point as a result.

Maybe not that interesting but for two reasons I've included
this picture. It shows an end block which is quite similar to
those that can be found in the Telesforo Julve guitars and
besides that 6 rather crudely shaped clamps in order to
strengthen the two seams of the 3 piece soundboard. The
same feature I found in my fifties Telesforo Julve that
has a 3 piece soundboard as well. It is even questionable
wether if the builder did this on purpose as there are also
three piece soundboards on some Antonio de Torres guitars.
Exactly the same shaped end block in my fifties TJ guitar.

It would have been logically that with the loosening of
the now visible transverse brace the soundboard cracked
along the fingerboard as a result of string pressure but
after having removed the fingerboard it became obvious
that the so called cracks in fact are seams of the middle
part of the soundboard. There was no other way to make
a proper correction of the "moved" soundboard piece
under the old fingerboard without removing it.
Now the bit deformed whole neck setting as a result
of string tension is able to "come back" to its'
original position. Another problem remains the scale
of the original fingerboard: 650 mm as the distance
between the nut and 12th fret is 325 mm but from
the 12th fret to the bridge bone 320 mm (!) Partly due
to the deformation of the whole neck area but also a
not properly glued bridge distance! I have an ebony
fingerboard already slotted for a 640 mm scale.
I can place that instead of the original and still have
a 2 mm compensation which is normal nowadays.
And remember: In former times there was not taken
care for a compensation as string height was usually
much lower!

I will close the seam on the right properly and make an
insert left as that part will be covered by the new fingerboard.

Securely flattening out this area and comparing
it with the rest of the neck is very important now
as I decided to place the frets before gluing the
fingerboard. The pictured area is too vulnerable
for hammering in frets even with a decent support.

I have a 19 fret fingerboard now which is very suitable for
the more demanding musical pieces. As I explained earlier
the scale is now 640 mm with a compensation from the
12th fret to the bridgebone of 2 mm.

As the earlier fingerboard had a scale of 650 mm I had
to make a solution for the top nut. If you take a closer
look at the first Juan Estruch presented in this blog you
can conclude I used their own method to solve this
problem. Just a small piece of ebony placed above
the top nut so the new situation has a natural look
regarding proportions.

The twelfth fret is a fraction more reachable now but
that can play an important role in some musical pieces.
Next step is to glue the back in place. I think it has to be
shortened by around 2 / 3 mm for a proper neck reset
and that won't be a big problem.


The back has been placed and glued. The top has been
treated with a greyish color remover for bare wood and
that had a significant effect on the color of the top. The
sound after putting the strings on is typical for the Valencia
guitars but compared to my fifties Telesforo Julve it
has more power in the higher notes. The guitar is not
"shining" (brightness of the higher notes) the way my
Jose Ramirez 1945 does but that can have two causes:
The top still has to be relaquered and the guitar needs
to be "played in" again! The soundbox own frequency
lies on the note G which means 98 Herz.

Not yet the "final" result as the binding on the back has
to be redone partly: Gluing on an existing back and giving
the instrument a slight neck reset at the same time means
an inevitable unevenness at some spots. But the top is
relaquered now. Most of the time I polish the varnish
after about a year as only then you can get the amount
of brilliance in the lacquer you want because the lacquer
has to be hardened out. I used an Alkyd lacquer that
indeed adds to the brightness of the higher notes and
can be removed quite easily if there is a need to.

The relacquered back. And the sides have been done as
well as the old varnish gave the wood a more yellowish
appearance and that wouldn't combine with the varnish
on the back. It is a nice clear lacquer.

The result makes it obvious that walnut has a beauty
of its' own. These quality of walnut is simply different
from the later Spanish study guitars of the sixties and
seventies. The binding has been done by Bram Waque.
He did a nice job as well.

Maybe I will come up with an added strip between the
outer heel and the soundbox as that has been a bit crudely
done in the past.


The back of the guitar in combination with the rest.

In fact there were still two problems: The bridge was constructed
quite heavy and too high for a good playing action. Apart from that
the holes for the strings in the tieblock were placed too high.
As a result the strings didn't make a proper angle over the bridge
bone and were still too far away from the fingerboard.

As the fingerboard has been replaced with an ebony one I decided
to make an ebony bridge as well though less high as the original
one as the weight of a bridge has a negative influence on the
sound of an instrument. The Telesforo Julve strips are there!
It is a very nice playable and sounding instrument now with
a bit of a narrower neck suitable for some pieces.
Another Juan Estruch labelled guitar: Restoration process


Presented here is the situation how this guitar came
to me. Several issues but curiosity made me want to
do something with this smaller (Parlor sized) guitar.


And the situation as it is now. At first a cleaning
process and several repairs I did on this guitar that
has a lot of similarities with a Vicente Parres /
Ponce guitar I have, most likely coming from one
of the Valencian builders like Andres Marin (?)
Salvador Ibanez, Roca and others. What surprises
me every time is the sound coming out of these
in fact simple executed guitar models. A very
good balance, surprisingly beautiful bass sounds
and a sturdy melody tone that listens carefully
to the place where you hit the strings.
Here below you will find the presentation of the
restoration process. People often are asking me
"Is it worth all that work?" When you want to make
money in restoring these simple guitars, no but
for the future they should stay around to my opinion.
Scale: 615 mm Width topnut: 50 mm.

And again the Roca named firm in fact was responsible for
this label. Of course a lot of Spanish guitar factories were
using labels that were look-a-likes. The edges on this guitar
simply crumbled under my fingers which made me think
this guitar has to be quite a bit older than the period suggested
by Ton Bogaard on his site guitarrasvalencia.wordpress
com is stating around these labels.
This label has been used for a long time by the Estruch
company and although Ton states it to be used roughly
between 1930 and 1960 we already found a concert
guitar from 1920 with this Calle Ancha 30 label on
an Argentina website:
Hermanos Estruch already was active on the address
Calle Ancha 30 from 1902 onwards. One of their sons
Juan Estruch Sastre remains later on the same address
from onwards1927 onwards just as his son Juan
Estruch Pipo did. The Jedistar site states this round
Spanish woman label to be used already in 1920.

Quite common was the use of only concentric circles
around the sound hole and most of the time these guitars
were only ladder braced. The lacquer on this guitar
was too far gone and very brittle. It took 10 minutes
to remove it completely from the soundboard but
possible a 3 bar fan brace wil be placed, depending
on how the top will react to future restorations.
The label here says: "Enrique Torres Barcelona" but
a lot of dealers used fake names and didn't even built
these guitars themselves. Often derived from Valencia
based companies.

Not the guitar in question here but a look-a-like
with the "Enrique Torres Barcelona" label here
above

A lot of dirt on the soundboard and the inevitable
scratches in the wood from a long time playing.

At the bottom the edge inlay is missing and the
pieces that were still there simply crumbled under
my fingers. A new wooden inlay will be glued.

This is the way the labels have been sticked in
these guitars. I should turn it a bit more in order to
have the pillars standing vertical (upright).

The first move was to repair the G tuner here.
There was no worm gear anymore and also the axe
holders were gone. Luckily I have a lot of spare
parts and the knob on the right I made out of a
piece of ivory. It is rather strange, these individual
machine heads placed on a guitar like this. And
moreover it has been marked with the prefix "G"
A mystery still unsolved....


As often with older Spanish guitar also this guitar suffered
the tension of metal strings and as a result the bridge came
off. As there was already a gap, removing the bridge was
no big deal. With a hair dryer and some sharp knifes you
are there. Cleaning and flattening both surfaces is a must
before you install the bridge as well. You need to be aware
of the fact that in the first half of the 20th century a lot
of these bridges were glued in a slight angle in order to
compensate for a right octave pitch.

As for the removing of the back: This was necessary as the
tranverse bars on the back were pushing the sides away.
In fact a normal result as wood tends to expand and shrink
on a 90 degrees direction of the wood grain. So the wood of
the back must have shrinked over time resulting in sticking
out of the transverse bars on the outer spots.

As with most cheaper guitars there simple is not even a
decent ladder bracing on the sound board. As the top needed
to be cleaned from the crystallized lacquer the top might
be in need to have some more support in order to keep it
straight. So most likely a 3 piece fan brace will be glued
in this one.

At first glance I thought there must have been moisture
problems on this guitar in the past but the strange traces
near the inner heel of this guitar are simply in the wood.
The lowest transverse bar sticks out on the left here.
In most higher end guitars there also is a transverse bar
above the label. I will take care of that as well as that
bar prevents cracks alongside the fingerboard as well.

As a result from the lowest transverse bar that is
sticking out (In fact as a result of the shrinking of
the back wood) the side is slightly damaged and
moreover the glue linings are loose from the
sides, it shows another necessity to open these
older guitars in order to check these damages
and reglue other parts. The possibility is there
to even place extra glue blocks between sides
and top and reinforce the sides on possibly some
weaker points.
Older guitars often tend to have playing traces of course.
Most of the time just beyond the sound hole when the
guitar is held in playing position. Some dirt was collec-
ted on that spot but a treatment with oxalic acid often
is doing miracles in that field. The sound board in an
almost like new condition though after a French polish
treatment the color will be much darker. Maybe the
edge inlay will be renewed as well. Of course it is not
my intention to make a new guitar out of it but in this
case removing of the old lacquer simple was a must.
Some playing traces on the concentric circles around
the sound hole are too deep but that has to be part of
this guitars' history.

When you remove a back from a guitar, some deformations
are likely to happen. The back of this guitar shrank in the past.
In order to have everything just fine for the new situation, I
glued in an extra center piece. Though not original, it will
finely cover the sides now. Then there is no need to fill out
the back alongside the edges. Moreover, that is a very time
consuming process. By placing the center strip, I figured it
to be wise to glue in a strip piece the way it would have
been done in a more expensive guitar.

The leveling out and refinishing of the back will be
done when the back is glued on the guitar again.

The two transverse bars have been glued under a slight angle.
Maybe a sign of some sloppiness? Near the inner heel you can
see the extra glued rather wide piece of wood. When the wood
of the fingerboard works different from the soundboard wood
itself that often causes cracks alongside the fingerboard left
and right. But you will also often detect a move of the neck
towards the sound hole, causing cracks and deformations on
both sides of the inner heel. This piece of wood is able to
prevent that a bit. As I had good experience with the placing
of extra glue blocks in between the existing ones and then the
way they did that in the Salvador Ibanez workshop and later
in the Telesforo Julve workshops, I did so.

As was customary in the Spanish workshops, the braces for the
back have been glued to the sides already and not on the back
itself. I securely positioned the transverse bar in the lower bout
and to exact dimensions corresponding with the back. Some
possible vulnerable area's just aside the glue lining for the back
I've strengthened with polyester. A method that also has been
used by some furniture restorers I know.

I removed the old (too low) frets and then I'm able to shave
away the fretboard towards the head in order to get a better
playing action and angle rom the strings over the bridgebone.
Flattening out the surface under the bridge before regluing
is a must. The new frets will be only installed when the back
is placed and glued onto the body as only then it becomes
clear to what extend I need to shave off the fingerboard.

Support between soundboard and back is needed for the
mounting of the highest frets. The edge inlay was in a very
bad condition as it crumbled while removing. I will use
some new rosewood strips for that purpose.

At the beginning of the neck there often are deep carvings into
the fingerboard, caused by too long nails on the left hand. By
shaving off about 2 mm on this spot, I could get rid of these
damages and moreover, the wood under the ugly black layer
of paint becomes visible. It appears to be a hard and reliable
wood for this purpose with its' own beauty!


I repainted the neck and its' head as there were traces
traces in the wood that couldn't be removed sufficiently.
While making everything ready for a black finish the
irregularities in the sleeves for the tuners could be
cured to some extend. It remains visible that the
tuners aren't placed in line with each other left and
right. That's a part of this guitars' history.

The repaired tuner for the G-string is visible and
is still working. These individual tuners appear to
be original by inspecting the holes for the screws.

Visible on the right is a newly made topnut. As the
fineerblad has been shaved the hight of the topnut
too high of course. Moreover the spacing for the
strings wasn't done in the right way.

It remains questionable what kind of wood has been used
for sides and back. Anyway the places where there was
some damages have been sufficiently treated.

I've treated the surface of the fingerboard with a powder
stain and afterwards a mild layer of satin varnish has
been applied to protect the soundboard. The new frets
of course were installed afterwards.

When you have to remove the bridge it is a little extra
to equip the bridge with a twelve hole construction.
It gives a better angle over the bridgebone.

The guitar body as a whole has been French polished.
I might do some corrections still when everything has
been hardened out.

Though not original the black neck suits the wildly
figured back well to my opinion. And the center strip?
everyone might have its' thought about that but it was
a good solution for the slightly changed plantilla after
the back was removed. Simply necessary.